




Southern West Bank Guide: Medinet Habu, Deir el-Medina Artisans' Village, Ramesseum & Colossi of Memnon
Explore Luxor's Southern West Bank circuit: deep-cut painted reliefs at Medinet Habu, the workmen's village and tombs of Deir el-Medina, the Ramesseum, and Colossi of Memnon.
Most cruise-ship excursion buses on the West Bank of Luxor visit only the Valley of the Kings and Hatshepsut's Temple. Yet the four monuments along the Southern West Bank mortuary belt preserve the deepest-cut hieroglyphs and brightest original ceiling paint in Thebes. The Colossi of Memnon, Deir el-Medina, Medinet Habu, and the Ramesseum sit along a compact 2.5-kilometre arc. You can explore all four sites together in a relaxed 3.5-to-4-hour morning loop without crowds. Below is our step-by-step route, ticket checklist, and architectural guide.
| Stop & Order | Ancient Name & Era | Approx. Nov 2026 Card Fee | Where to Buy Ticket & Duration |
|---|---|---|---|
| 1. Colossi of Memnon & Amenhotep III Temple | Kom el-Hettan (18th Dynasty, c, 1350 BCE) | Free roadside viewing | Stop first at the West Bank Ticket Office directly opposite to buy your Ramesseum ticket (15 mins) |
| 2. Deir el-Medina (Artisans' Village) | Set-Ma'at, "Place of Truth" (18th to 20th Dynasties) | ~220 EGP base (includes TT1 Sennedjem & TT359 Inherkhau) | On-site card booth or main West Bank office. Add ~140 EGP extra for Peshedu TT3 (75 mins) |
| 3. Medinet Habu (Temple of Ramesses III) | Djanet (20th Dynasty, c, 1155 BCE) | ~220 EGP by card | On-site card terminal at the entrance plaza (75 to 90 mins) |
| 4. The Ramesseum (Temple of Ramesses II) | Mansion of Millions of Years (19th Dynasty, c, 1250 BCE) | ~220 EGP by card | Must buy ticket in advance at the main West Bank Ticket Office near Colossi of Memnon (45 mins) |
Stop 1: The Colossi of Memnon and the Ticket Office Strategy
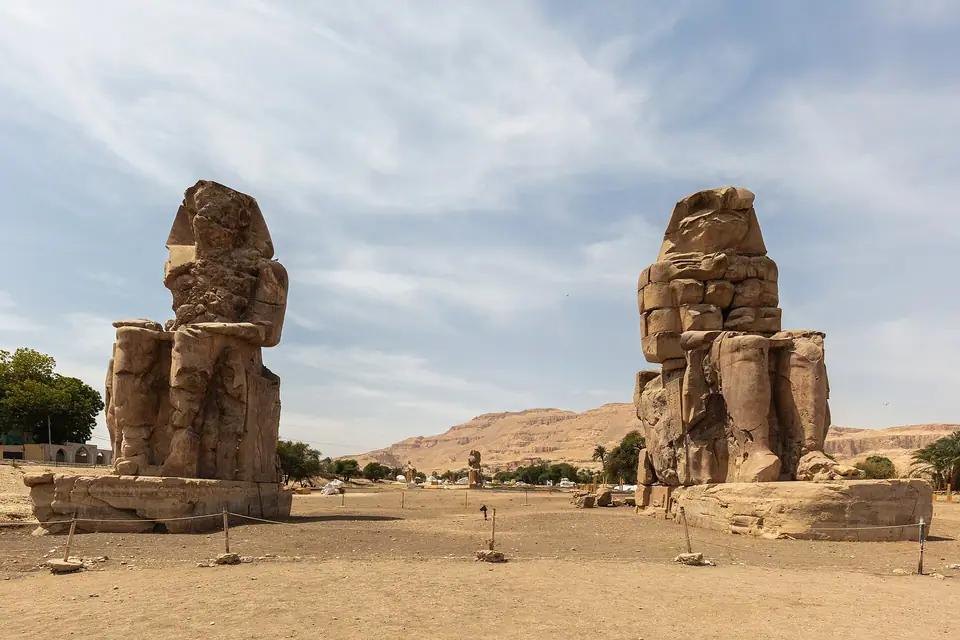
Driving west from the Al-Gezira ferry landing along the canal road brings you first to the twin Colossi of Memnon (el-Colossat). The two seated statues rise 18 metres (60 feet) high at the edge of the farmland. Quarried from single blocks of quartzite near modern Cairo and hauled 670 kilometres upstream, each statue weighs roughly 720 tonnes. They depict Eighteenth Dynasty Pharaoh Amenhotep III seated on his throne, flanked at his calves by Queen Mutemwiya and Queen Tiye.
The statues guarded the First Pylon of Amenhotep III's vast mortuary temple (Kom el-Hettan, currently under intensive conservation behind the colossi, where additional standing alabaster and quartzite colossi have recently been re-erected). A strong earthquake in 27 BCE cracked the upper torso of the northern colossus. Greco-Roman travellers reported that the statue emitted a musical whistling note at dawn as sunlight warmed the fissured stone. Greek visitors identified the singing statue as Memnon, the mythical son of the dawn goddess Eos slain by Achilles at Troy. Around 199 CE, Roman Emperor Septimius Severus patched the upper blocks and silenced the sound forever. Crucial Field Step. Right across the road from the Colossi car park stands the Main West Bank Antiquities Ticket Office. Step inside with your bank card to buy tickets for the Ramesseum and the Tombs of the Nobles.
Stop 2: Deir el-Medina (The Royal Tomb Builders' Village and Painted Vaults)
Driving 1.5 kilometres west into a sheltered desert hollow behind Qurnet Murai hill brings you to Deir el-Medina (ancient Egyptian: Set-Ma'at, "The Place of Truth"). Founded by Thutmose I around 1500 BCE, this walled village housed the elite brotherhood of royal quarrymen, draughtsmen, and painters. Those artisans excavated and decorated the tombs in the Valley of the Kings. Because these literate artisans had access to royal pigments and worked on their own family sepulchres during their days off, their miniature vaulted tombs on the western cliff are striking:
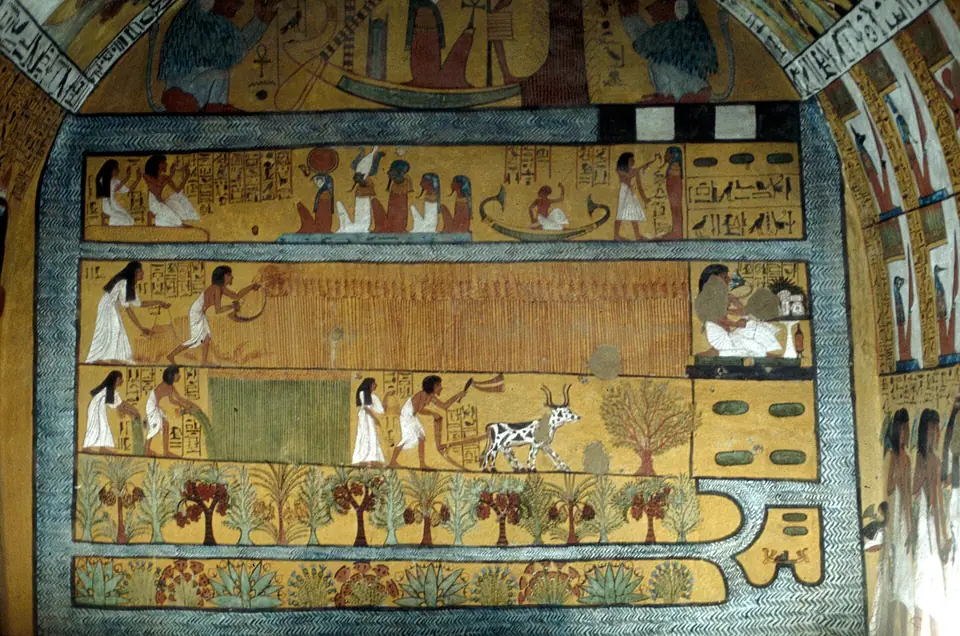
- The Tomb of Sennedjem (TT1) and Inherkhau (TT359, Included in the ~220 EGP Base Ticket). Climb the hillside steps and descend the steep metal ladder into the intact vaulted brick burial chamber of Sennedjem (TT1, discovered untouched in 1886). Against a glowing golden-yellow background, Sennedjem and his wife Iyneferti plough and harvest wheat in the fertile Fields of Iaru (the Egyptian paradise). On the adjacent panel, Anubis tends Sennedjem's mummy on a lion-shaped couch. Just below lies the two-chamber tomb of Foreman Inherkhau (TT359). Its walls show intimate portraits of the foreman with his grandchildren and the Great Cat of Heliopolis slicing the serpent Apophis.
- The Tomb of Peshedu (TT3, Optional ~140 EGP Extra Ticket). Worth the small add-on to see the famous barrel-vaulted painting of Peshedu kneeling beside a date palm to drink from the waters of the afterlife under the giant protective wings of the falcon Horus.
- The Walled Village Street, Great Pit, and Ptolemaic Temple of Hathor. Walk down the central lane of the 68-house workmen's village, where history's first recorded labour strike occurred in Year 29 of Ramesses III (c, 1152 BCE). At the northern end of the enclosure, step inside the sandstone Ptolemaic Temple of Hathor and Ma'at to see its Judgement of Osiris relief.
Stop 3: Medinet Habu (The Fortified Mortuary Temple of Ramesses III)
One kilometre south of Deir el-Medina rises Medinet Habu, the monumental mortuary complex of Twentieth Dynasty Pharaoh Ramesses III (reigned c, 1186 to 1155 BCE). Second in size only to Karnak, Medinet Habu is the best-preserved temple in Luxor (around 220 EGP by card as of November 2026):
- The Syrian-Style Fortified Migdol Gateway (High Gate). Unlike any other Egyptian sanctuary, you enter Medinet Habu through a two-storey stone gateway modelled on Syrian migdol fortresses. Its upper chambers preserve intimate reliefs of Ramesses III playing senet board games with royal women.
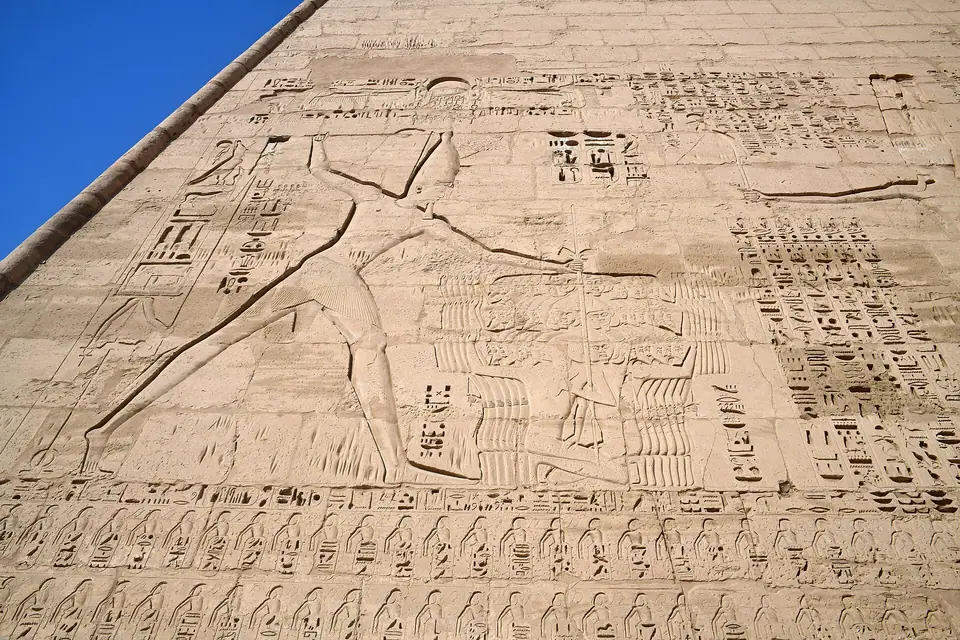
- 15-Centimetre-Deep Sunk Hieroglyphs and Original Ceiling Blues. To prevent successors from usurping his cartouches, Ramesses III ordered his masons to chisel his inscriptions 15 to 20 centimetres deep into the sandstone. You can place your entire hand inside a single carved ankh or falcon sign. Walk through the First Pylon (showing Ramesses III smiting enemies before Amun-Ra, with a comical relief of frightened royal princes holding the reins of his horses at the base) into the Second Peristyle Court. Early Christian Copts plastered over the upper porticos when they converted the court into the church of Jeme. When that mud plaster fell away, the architraves and lotus capitals revealed 3,100-year-old turquoise, lapis-lazuli, and crimson paint.
- The Sea Peoples Naval Battle on the Exterior Northern Wall. Walk outside along the northern exterior wall to inspect the famous relief of the Naval and Land Battle against the Sea Peoples (c, 1178 BCE). Feathered-helmet Peleset and horned-helmet Sherden warriors capsize in the Nile Delta marshes while royal scribes count enemy hands. On the rear of the First Pylon, look for the dynamic relief of Ramesses III hunting wild bulls in the marshes.
Stop 4: The Ramesseum ("Ozymandias") and its Mud-Brick Granaries
Complete your southern loop 1.5 kilometres north at the Ramesseum, the mortuary temple built by Nineteenth Dynasty Pharaoh Ramesses II (~220 EGP ticket bought earlier at the Colossi office). In the second court lies the shattered upper torso of the fallen colossus of Ramesses II. Carved from a single block of pink Aswan granite standing originally 19 metres tall and weighing over 1,000 tonnes, it is the largest free-standing statue of antiquity. Its shoulder carries Ramesses II's throne name Usermaatre, rendered into Greek by Diodorus Siculus as Ozymandias. That shattered giant directly inspired Percy Bysshe Shelley's famous 1818 sonnet. Beyond the Osiride pillars of the second court, walk through the 29 columns of the Hypostyle Hall and its astronomical ceiling. Surrounding the stone temple stand acres of vaulted ancient mud-brick storehouses and granaries.
Traveller tips
For photography, visit Medinet Habu between 08:00 and 10:00 when eastern sunlight pours through the First Pylon into the painted courts. Alternatively, arrive at 15:00 when angled light rakes across the exterior Sea Peoples reliefs. Combine this southern circuit with Day 3 of our 3-day Luxor itinerary and cool off afterwards at the Luxor Museum. At Deir el-Medina, note that the subterranean burial chambers of Sennedjem (TT1) and Inherkhau (TT359) are reached via narrow vertical iron ladders and steep steps. Take your time descending backwards down the rungs, and wait two minutes at the top if another couple is already inside the small vaulted room. Across the road from Medinet Habu, shaded local cafés serve cold bottled water and fresh lemon juice while your driver waits in the car park.
Where it is
- 1Southern West Bank
- Luxor International Airport (LXR) · about 12 km from here in a straight line
- Directions in Google Maps
Traveller tips
Real advice from people who have been to Luxor. Every tip is read by our team before it goes live.
No tips yet. Been here? Yours could be the first.
Thank you! Your tip will appear here after a quick review.
More in Luxor
Continue exploring Luxor with related neighbourhood, food, and planning guides
How to Get to Luxor & Around: Airport (LXR), Cairo Sleeper Trains, Nile Ferries & West Bank Taxis
Luxor, Egypt
Best Time to Visit Luxor: Upper Egypt Desert Climate Normals, Winter Sun & Summer Heat Strategy
Luxor, Egypt
What to Wear in Luxor: Subterranean Tomb Heat, Sun Protection, Footwear & Upper Egypt Modest Dress
Luxor, Egypt
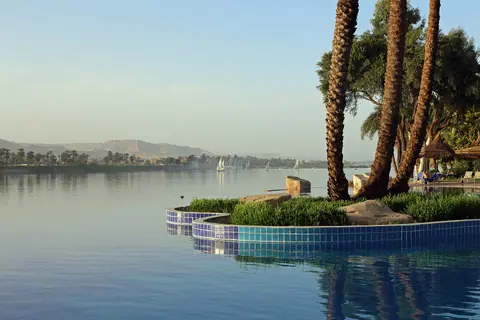
Where to Stay in Luxor: East Bank Corniche Resorts vs West Bank Al-Gezira Garden Guesthouses
Luxor, Egypt